
Moisturizer Modifications (R4 and later)
WARNING - I take NO responsibility if you blow up your moisturizer, you aren't gonna die trying but if you're not careful you could potentially blow shit up (i.e. break your Ekdahl Moisturizer). That being said, these modifications should be really easy to do and they have been designed to be as non-intrusive as possible, no modifications of the actual circuit board is necessary. Even a beginner should be able to do this if following the instructions carefully, for someone with soldering and circuit experience, not even the mods marked "hard" should be hard at all.
These are the modifications for the Ekdahl Moisturizer revision 4 and later (SMD), for R3 and earlier (through hole) refer to the R3 mod page.
If you feel that these instructions are violently unclear, please contact me at
 .
.
All of these mods will require a soldering iron, some snippers, stranded wire (26 gauge or close), a power drill (hand or press, either way), wire stripper, (or sharp teeth, worked for me for years) some kind of solder-sucking device, very fine tweezers, lead free solder, tape (painters tape is good), pliers & a shitload of patience.
Most of these modifications are "scientific", as in they have been planned with a certain outcome in mind. Some of the mods however are more of a circuit-bent nature, which i have stumbled upon by accident.
Good praxis for the novice:
To get best results as a beginner, be PATIENT and don't use the shittiest tools you can find because your results will be poor, a tool that costs you $3 might last you 1 year while a $20 one might last you a lifetime. Cheap soldering irons are total shit but can be used if you only ever want to modify this one thing and isn't the least interested in modifying or repairing anything else / don't mind it being MUCH harder than necessary (i STRONGLY suggest buying a decent but cheap iron like the Hakko fx-888d or Weller WES-51). Never heat up an area for more then 5 seconds (hard with garbage irons as they work so badly), if using a temperature-regulated iron set it to 350C / 650F except for when soldering switches, then go down to 250C / 500F (since they like to melt inside). Always keep your tip clean and tinned. I only use lead free solder and i suggest you do the same. When it comes to drilling i suggest marking the hole position with a centre punch as it will automatically guide the drill in the right direction, and always always use a small drill first and build up to larger holes.
The mods
All the mods in here are the same as for the R3, refer to that page for an overview.
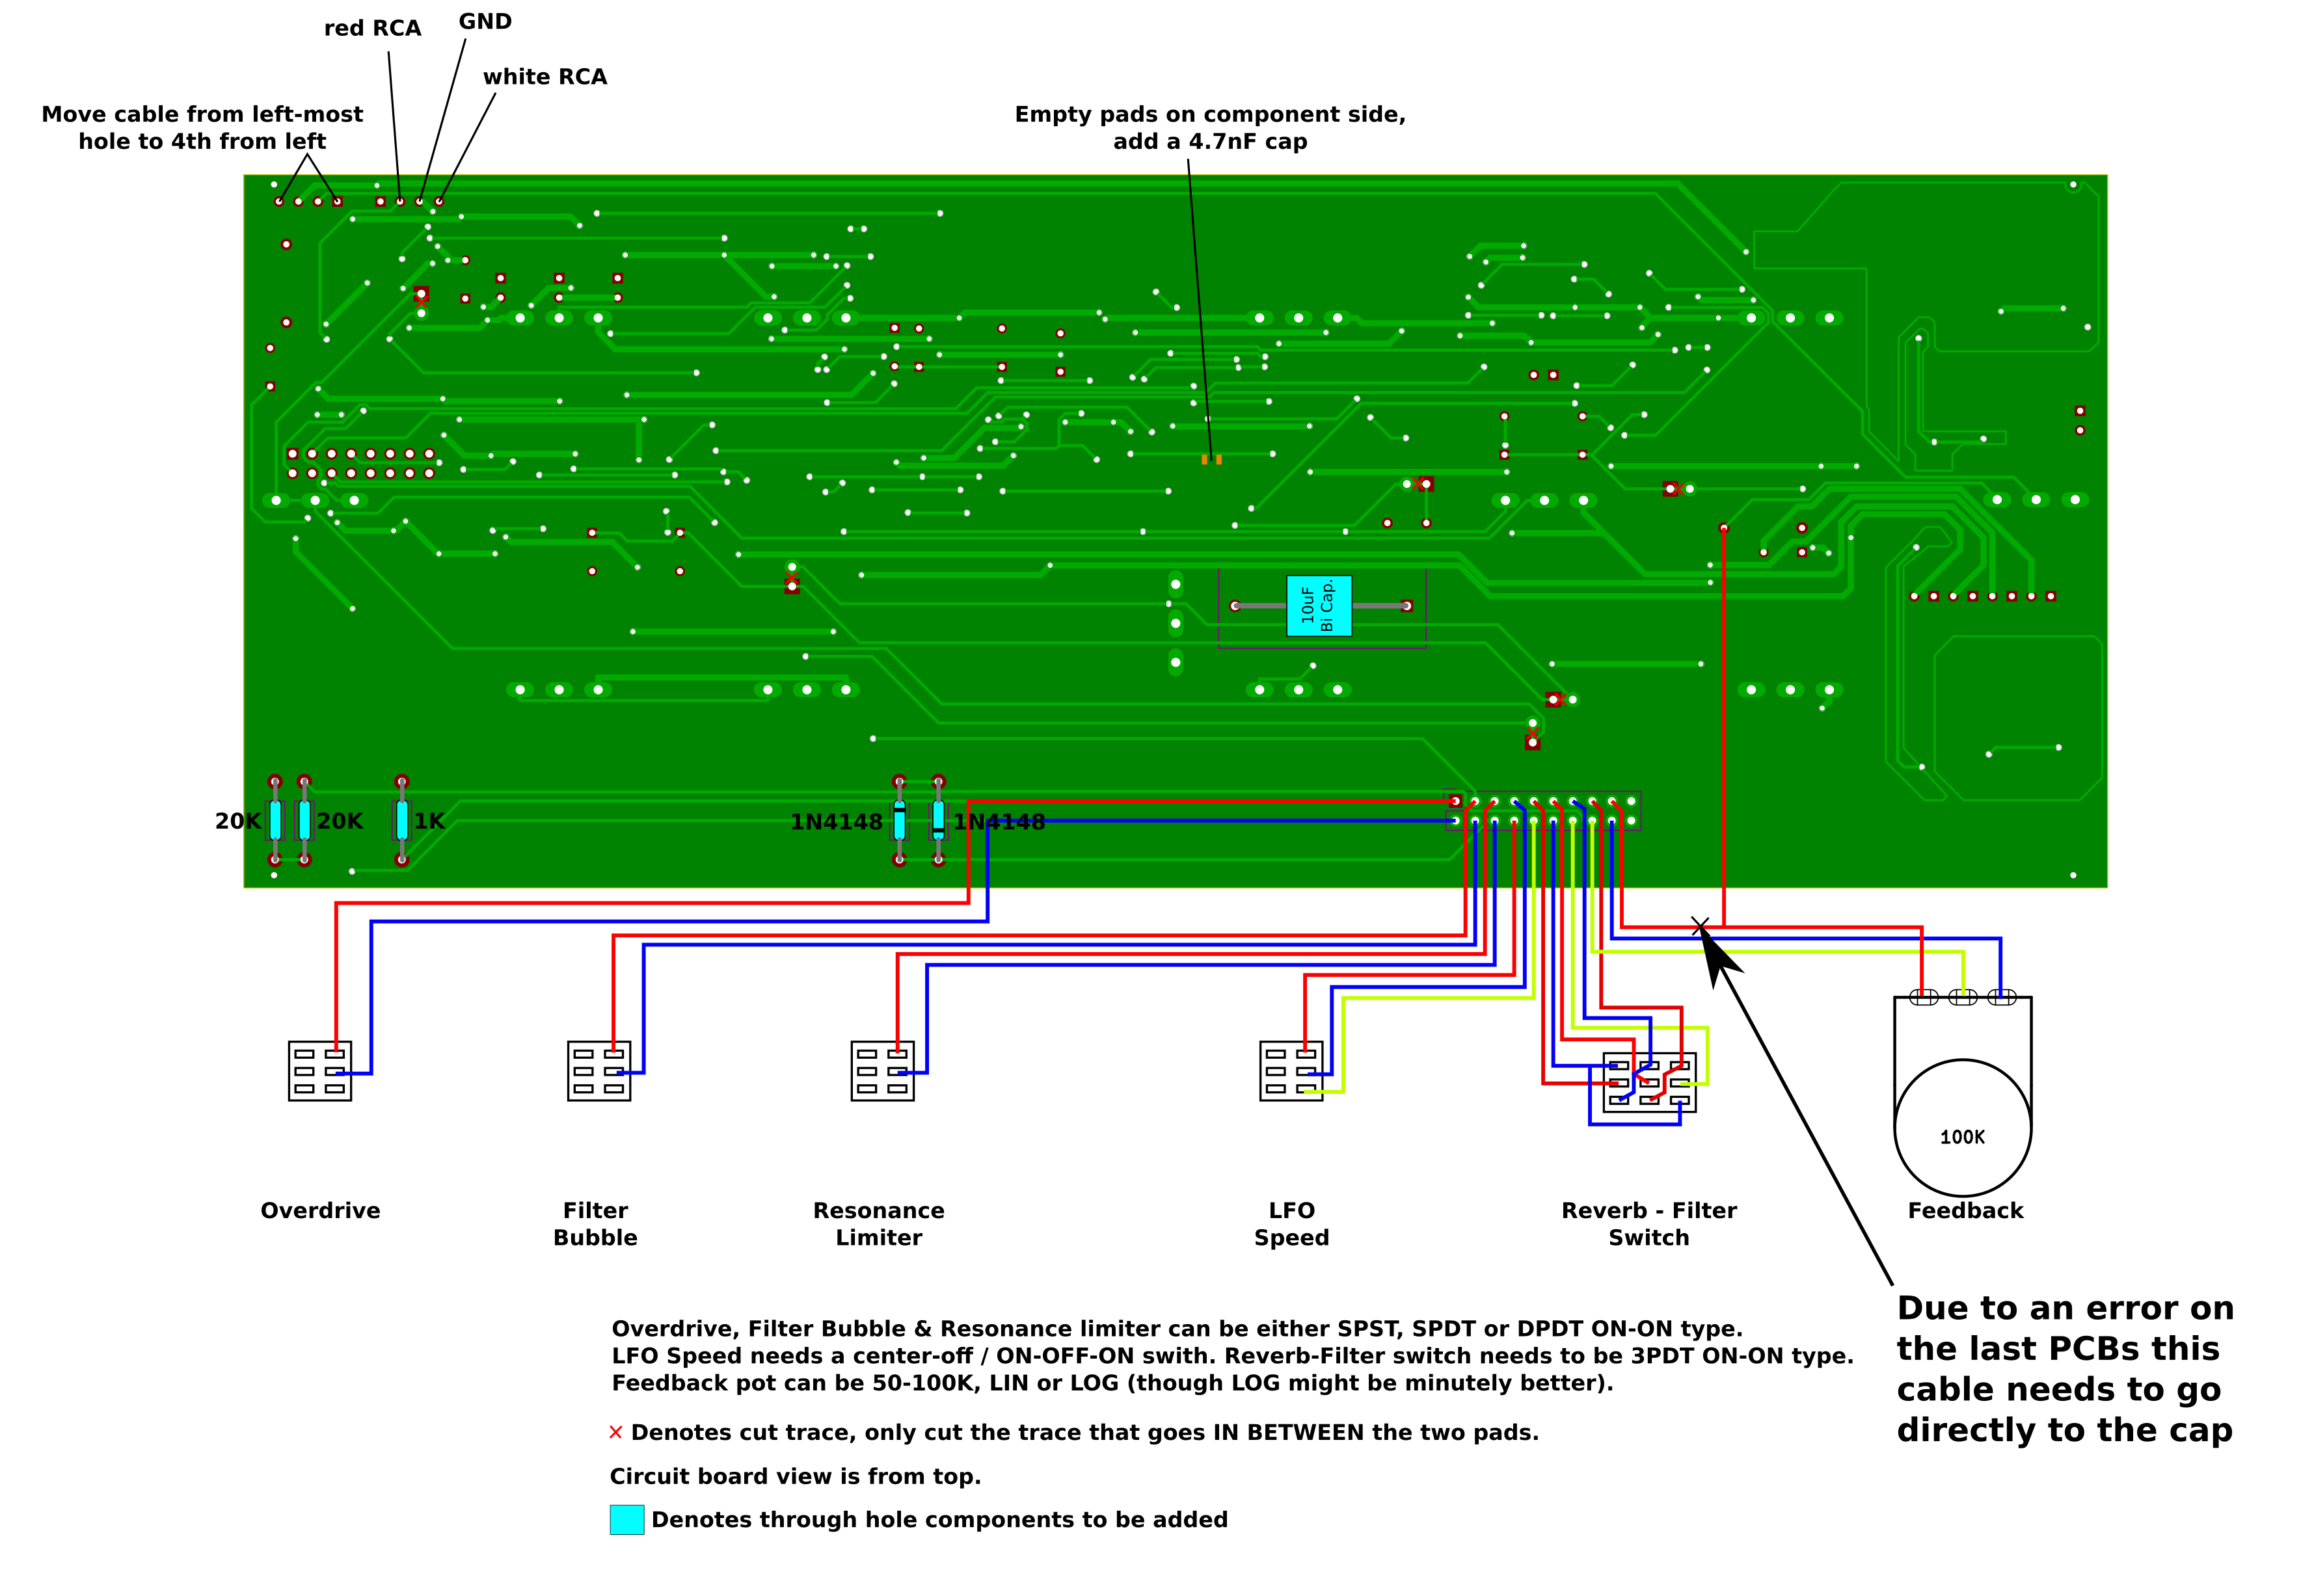
The 4th revision of the Ekdahl Moisturizer has all the mod points broken out as one header on the board, in order to modify it you need to cut all the traces marked (can be reconnected by solder-bridging the pads), add the components marked and move the one cable as shown at the top left.
The components you will need are:
- 2 x Through hole 20K resistors
- 1 x Through hole 1K resistors
- 2 x Through hole 1N4148 diodes or equivalent
- 1 x Through hole 10uF film capacitor (25V min, 22.5mm lead spacing)
- 1 x SMD 0603 1-6.8nF capacitor (dielectric not important)
- 3 x SPST switches (obv DPDT or whatever will work too but not necessary)
- 1 x SP3T switch (DP3T is aight)
- 1 x 3PDT switch
- 1 x 50k - 100k pot, lin or log doesn't really matter
- 1 x You may want a knob for that pot